I’m so excited to FINALLY be able to share my parent’s half bath makeover! I feel like we’ve been working on this project for 3 months versus 3 weeks. I will warn you, painting over wallpaper is not for the faint of heart and takes some serious prep work before you can actually get to painting. But the end pay off is so rewarding!
As a little backstory on how this project came to be: At the start of the COVID pandemic, my parents FINALLY took the plunge and started making major home updates. They updated all the flooring and even painted the walls. Luckily for me, this started the momentum of redecorating their home and updating the bathrooms that were in major need of a little TLC. We started with the downstairs half bath because we, honestly, thought it would be the easiest and the most rewarding, that dark green wallpaper had to go!
Step 1 (and the hardest step): Prepping the Walls for Paint
Honestly, we thought picking out the perfect color green was challenging enough, we never guessed there would be so much prep work before painting wallpaper! The internet gave us high hopes on how easy this project would be and we couldn’t have been more wrong. But, once you get through the prep, it’s smooth sailing.
There are 4 main things to remember when prepping your wallpaper for paint:
Make sure to take all hardware off the walls and seal the holes with Fast Dry Spackling. This includes all tower racks, toilet paper holders, mirrors, etc. Anything that can come off the wall should. Typically, when I paint, I paint around the fixtures, but when it comes to wallpaper, everything needs to go. We ended up keeping the light fixture on because it was too much of a hassle to move it.. and you still need light :).
No hole is too small to fill! In our experience, even if it’s just a tiny nail hole, it’ll need to be sealed because the paint wont cover it up like it would on a regular wall. Almost all of our hardware was held up with mollies. Mollies are great to use when you want to hang something heavy but don’t want to drill into a stud. But, they leave HUGE holes on your walls when you go to remove them.
Pro Tip for removing mollies: Take a screw and screw it into the molly about 1/4 of the way. Then, use a monkey wrench and pull/yank the screw (and the molly) out of the wall. Like I said, it leaves a big hole so just be emotionally prepared 🙂
Make sure all seams are completely flat, or cut them off. Honestly, this is where the internet failed us. Every blog post, every YouTube video, every article, raved about how simple it was to paint over wallpaper when the seams were still flat. Even if they aren’t, the process for cutting off or sanding down seams appeared very easy. In our experience, this was not the case and ended up being the biggest pain in the butt!
Ways to flatten out seams:
Rub 150 grit sandpaper over the seam until smooth. This was our first attempt to remove visible seams in the wallpaper but this ONLY works if your seams are still glued down perfectly to the wall.
Use spackle to fully cover the seams and sand it smooth. This was the best option for us and it works really well! Just take some plaster and rub it over the seams to completely cover it. Then sand it down with 150 grit sandpaper until it’s smooth with the rest of the wall.
Tip: Don’t just sand down the edges, make sure the entire surface is flat with the wall, or else you’ll be able to see the ‘humps’ when you paint. We know from experience because this happened to us.
Ways to not flatten out seams:
Attempt to glue down seams. In our experience this did not work at all and ended up causing a bigger mess.
Cut away any seams that have detached from the wall and sand down edges. Again, this didn’t work for us. It’s really hard to cut small seams without tearing off a larger chunk of the wallpaper.
Clean the walls. For this, we just lightly wiped down the walls with a damp rage, just to get off any dust. IF this was a full bathroom or a kids bedroom, you might need to clean the walls a little more with a stronger chemical.
Since we have dogs, I always recommend a microfiber cleaning cloth. These work really well when picking up dog hair!
Determine what kind of paint and primer you’ll need. This largely depends on the humidity and water vapor in the room.
If you’re painting a bathroom with a shower/tub then you can safely assume there will be a fair amount humidity and water vapor on the walls, so you’ll need to get a heavy duty primer and a paint that can stand up to high humidity. You really want to avoid allowing any moisture to seep through the paint and under the wallpaper.
However, if you’re painting a dining room, bedroom, or even a half bathroom, this isn’t as important because there shouldn’t bee too much water getting on the walls. That being said, we live in Texas and the humidity can get everywhere! So we took extra precautions.
Step 2: Paint and Prime
When I paint a wall (or even a piece of furniture), I don’t always use a primer. It’s a step that requires a lot of work with little reward so I typically skip it. However, when painting over wallpaper you MUST prime before putting paint over it. The main reason is: moisture. There is water in the paint that you’re using and that water can cause the wallpaper to shrivel up or bubble. And there is always water in the air that can get under the paint and (again) cause the wallpaper to shrivel up or bubble. So please make sure to prime your walls with an oil based primer. I used Kilz Original Interior Primer and it worked great!
For the color, after weeks of consideration and overanalyzing about 150 paint swatches, we decided on Pistachio Ice by Valspar with an eggshell finish (eggshell is between matte and shine). As for the brand, I’m not loyal to one paint brand. I typically find the color that I love with Sherwin Williams but honestly that’s just out of luck. Since this was my mom’s bathroom, she picked the color and my only piece of advice is: pick a color that speaks to you and will make you happy every time you look at it.
… Actually, I have more than one pieces of advice for picking paint color:
Pick a color that fits with your house. My parent’s house is very warm and traditional. They have deep brown hardwood floors and dark leather couches. So my black 1/2 bathroom wouldn’t fit well with the flow of their house. Choosing this light green with wood accessories was perfect for her house. Don’t always try to do what’s trending now, try something that fits perfectly with your home and it’ll always look good.
Make sure to test multiple colors on the wall BEFORE you go out and buy 2 gallons of one color. We had two paint swatches that looked identical, but when we put them on the walls they looked drastically different.
Lighting makes a huge difference! If you’re lucky, then you have a window or some form of natural light in your bathroom. But if you have to stick with lightbulbs, then changing these out can make a huge different with the hue (warmth level) of the room. So make sure you’re looking at paint colors with the correct light bulbs. This makes less of a difference if you’re in a room with windows or natural light but this 1/2 bath has zero natural light so we had to play around with the light bulbs a little.
I have very few windows in my town home so I’ve been playing around with light bulbs and these are my favorite! They are the perfect degree of warmth and cool, without being that sterile, white light.
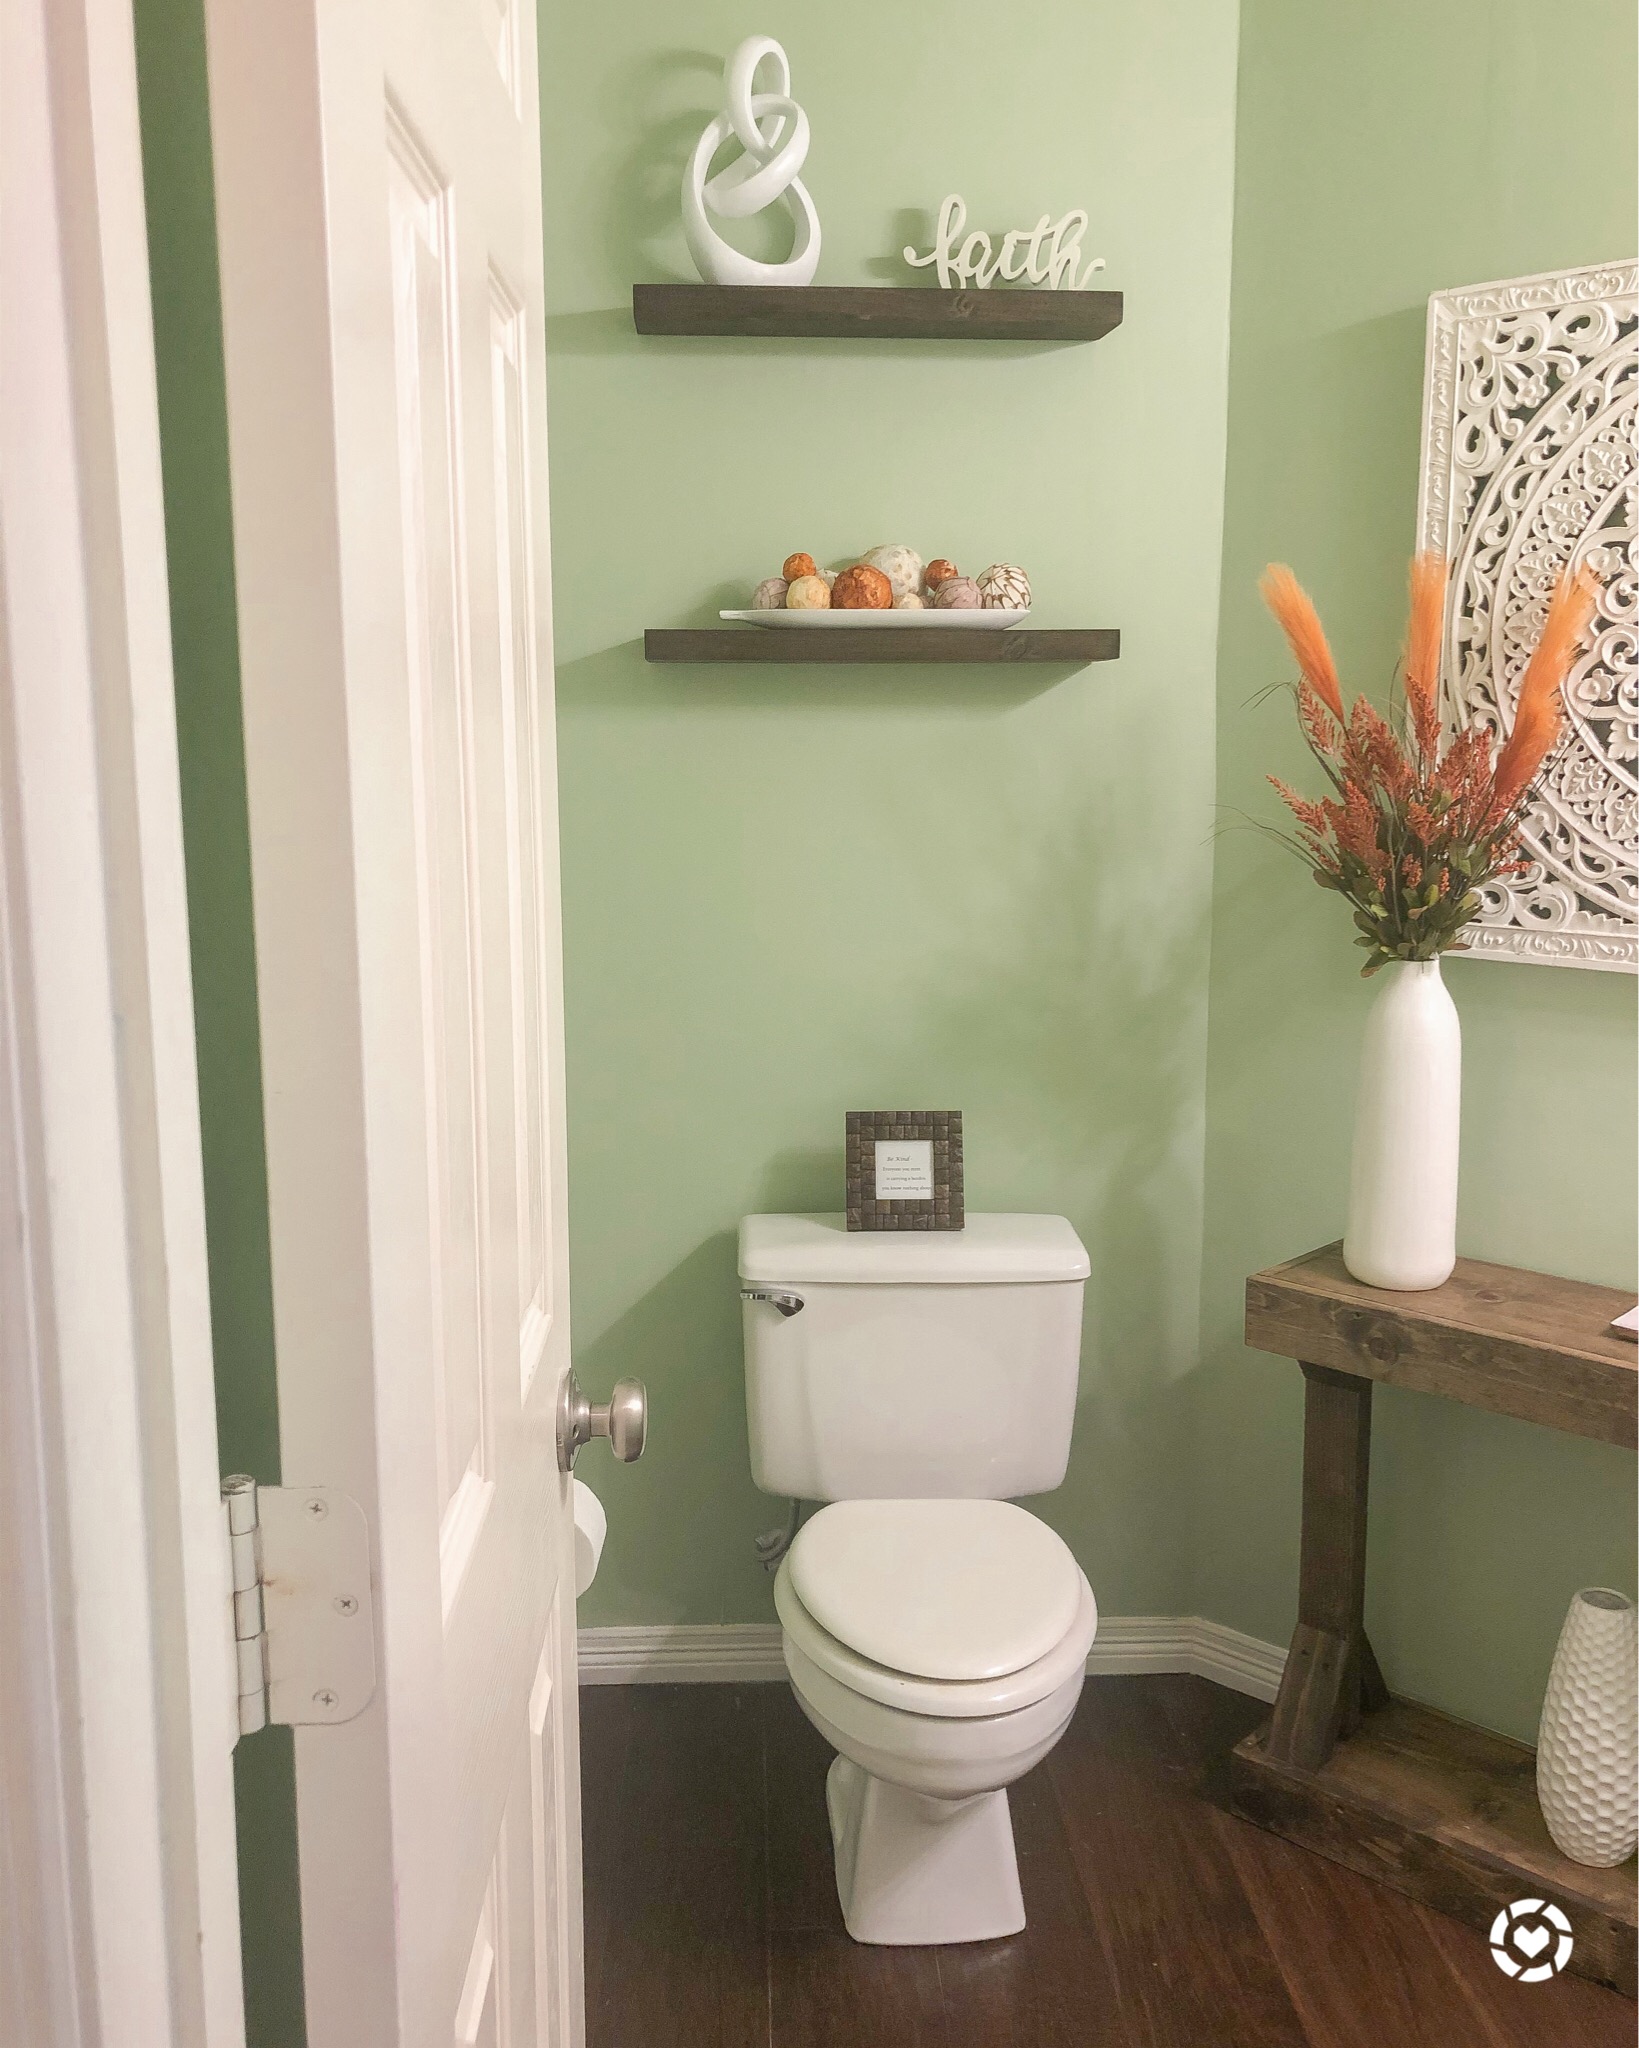
Step 3: Decorate!
Obviously, this is my favorite step! And similar to the paint color, buy items that speak to you, that you want to look at every day!
Find some inspiration. I always need to have an idea in my head before I set out to decorate a room, if you don’t then you’ll just end up buying a bunch of crap that doesn’t go together. And you never want to force it! We found an inspiration piece from Pinterest and it had a similar green on the walls with white and silver accents.
Decide on any furniture. We opted to add in a couple more thick pieces of wood to really bring in the warmth. So we found a thick wood table and shelves.
Find your accent pieces. Honestly, white accent pieces are easy to find just about anywhere! It’s such a popular color these days you’ll be able to find it anywhere. We were a tad concerned about having too much white so, spur of the moment, we decided to add in pops of orange which brought in more warmth.


