
Previous post

Next post


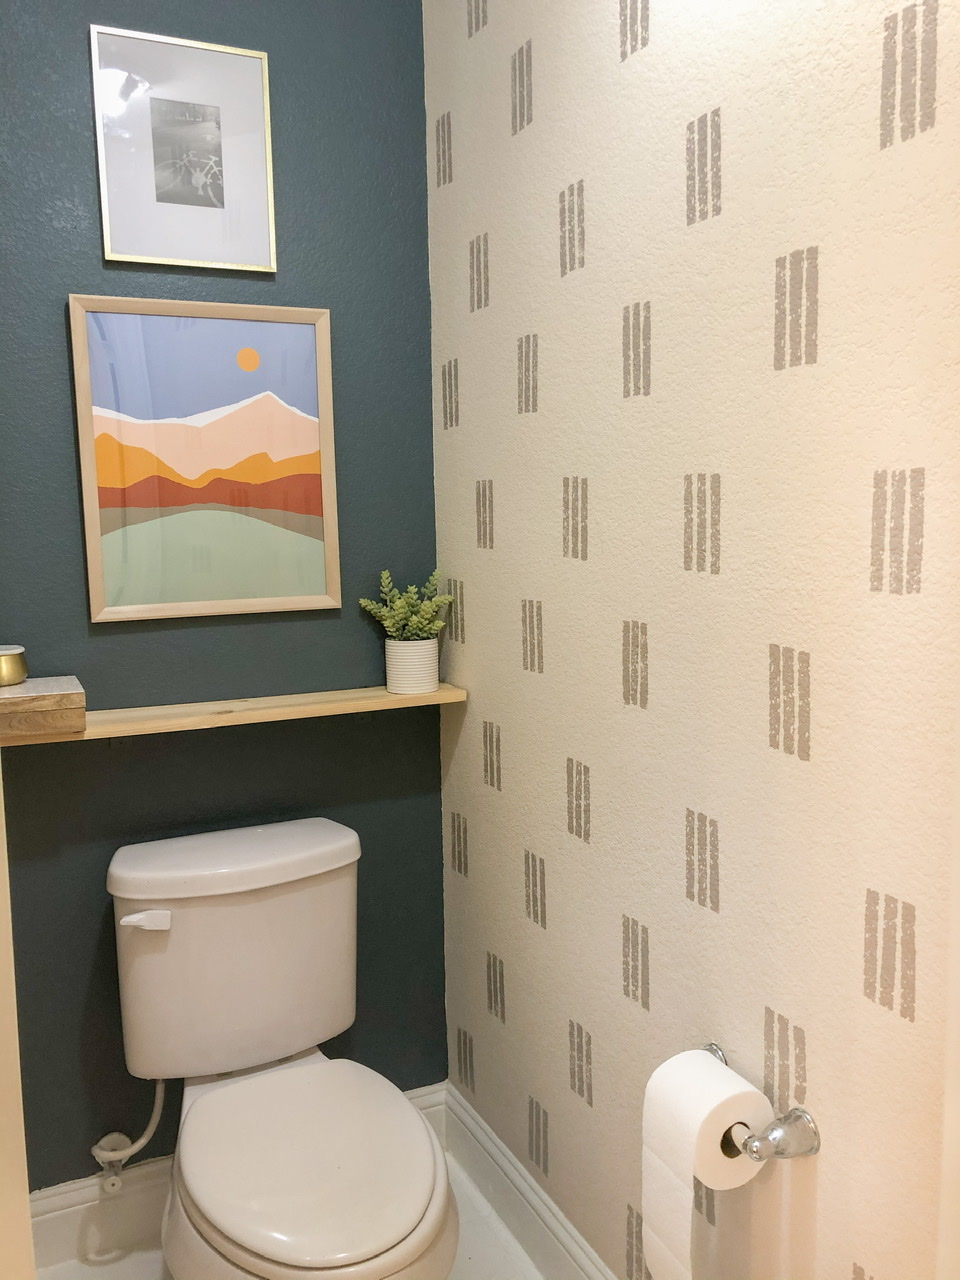
Throughout my journey of WFH life, I’ve had one goal in mind: touch every room in my house. The only ‘room’ that’s left is the ‘potty closet’. After my extreme laundry room renovation I was looking for a quick and easy DIY, which really just involves paint. This only takes one day and $60 !


You might be asking yourself: “what is a potty closet?” and don’t worry you’re not alone. I didn’t know what this was until I had one. Essentially, it’s a closet off the master bathroom that houses a toilet. It’s not considered a half-bath because it doesn’t have a sink. These are really common in Texas but maybe not in other parts of the country.
Once I discovered the term ‘potty closet’, it became easy to look for inspiration on Pinterest. What I love about this inspiration pic is that accent wall and the opportunity to do a sponge stencil wall. It adds dimension and interest without being overpowering.
If you’ve seen my downstairs half-bath then you know I love a good accent wall. Of course, I had to go with blue. Since I wanted to make this a quick DIY, I didn’t want to spend too much time over-analyzing the paint color. I went with Sherwin Williams, my go-to paint brand, and went with a color in their HGTV category. It makes thing so easy to pick out! I went with color Slate Tile (SW 7624).
I was so excited to do the sponge wall. One of my favorite things about it was “it doesn’t have to be perfect to look good”. Painting with sponges removes the expectation of crisp lines and exact placing. Things can be a little messy and still look awesome. But since I’m a perfectionist, I still had to measure everything out. I chose to stick with my inspiration piece and have 3 sponge lines in a section. Then I created a box with a separation of 12 inches vertically and 10.5 inches horizontally. I did’t measure the space before hand to make sure everything would fit perfectly, I just went with the spacing the looked the most appealing. While I think you can eye ball the spacing, but I used a tape measurer and a level to make the spacing perfect.
Before:


I’ve officially updated every room in my house in the last year of working-from-home! I expect an award.


