
Previous post

Next post


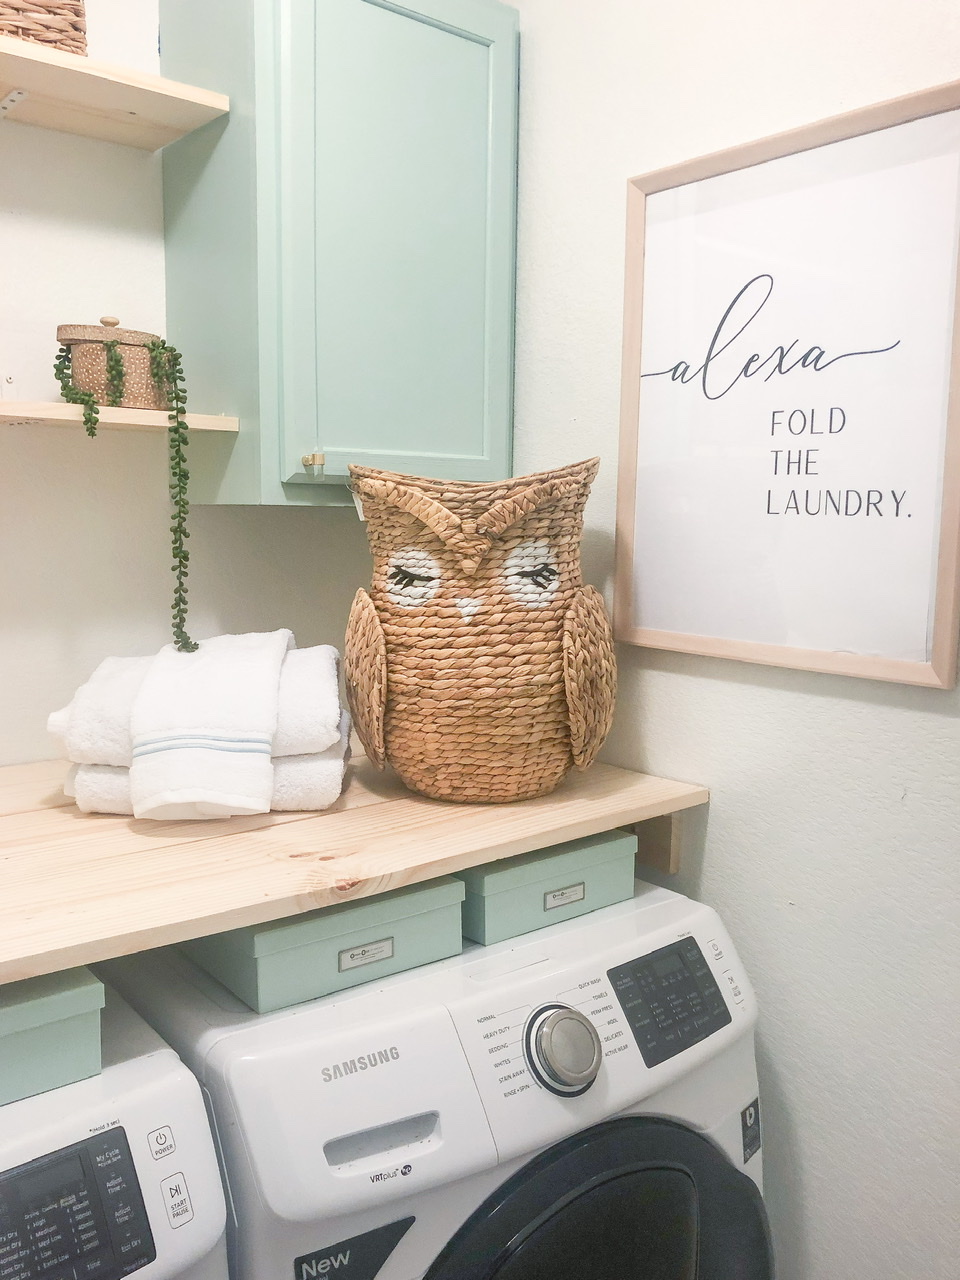
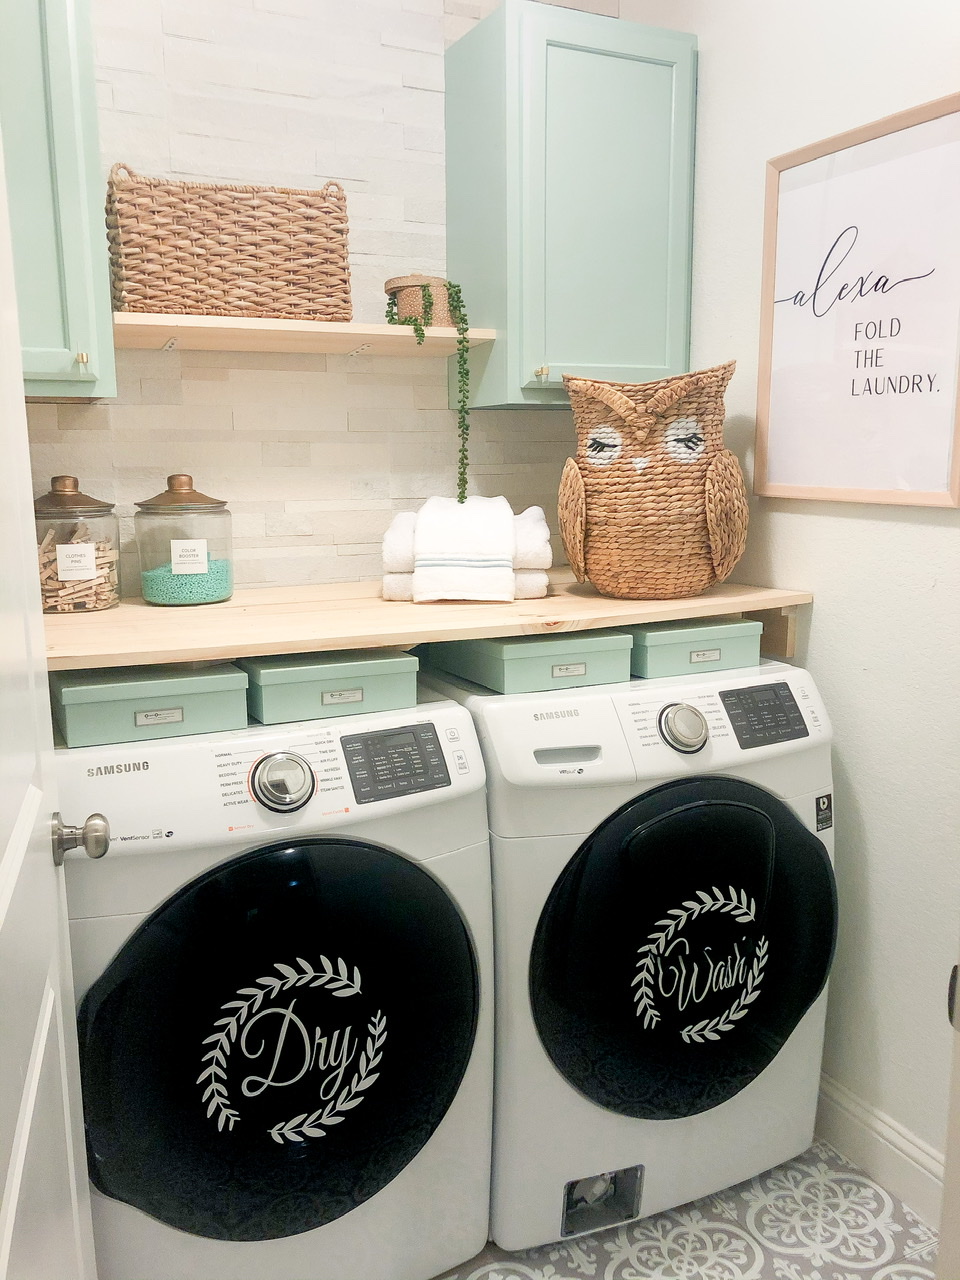
We’re finally doing Part 1 of the Laundry Room update! We did this room completely out of order but that’s okay! It’s finally time to add the countertop over the washer and dryer. This will add so much functional space, maybe I’ll actually fold the laundry the same day I wash it!
As a quick recap, the laundry room looked like this at the beginning of the year. First, I revamped the floor with some peel and stick tile, blog post here. Then I took out the shelf and added cabinets, blog post, here. Finally, it’s time to install the table for some horizontal workspace. I envisioned unloading the dryer and instantly folding all the clothes on this table… I’ll write a blog post in a year to see if this actually happened 🙂


The main question for this project: If the table doesn’t have legs then how does it stay up? In short, it attaches to the wall. After attaching the 2x4s to the wall with caulk and a nail gun, you’ll create a small ledge (L shape) using the 3 inch by 6ft boards. Sometimes it’s easier to explain with a picture so see below.

Then, the wood table will simple lay on top of the ledge. You can then choose to attach the wood to the ledge (using screws or nails) or keep it lose, like we did. Since our laundry room is so small, if we ever get a leak or need to get behind the washer and dryer, we will have to remove the table. So for us, it’s easier to just keep it uninstalled.

For this project, I really love the look of raw wood, and I wanted the table to match with my raw wood floating shelves. So I didn’t put any stain finish on the table. But I did use a sealer to just protect the wood from normal wear and tear and to keep it clean.


